Banner Text
- Select Setup|Banners|Edit
Banner to enter banner text.
- Select the number of banner columns
by incrementing or decrementing the counter for Number
of columns and choose Apply.
- Banner columns are displayed with
a column number, dashed line (default is 10) and a default significance
indicator (i.e. A, B, C, etc.) in a table-like grid with cells.

- Enter banner text for each banner
column by clicking in the cell below the column number. You can enter
multiple lines of text in a cell by selecting the Enter
key after entering a line of text or by allowing WinCross to wrap
appropriately based on the column width. Banner text is left-justified
by default - see Cells
Menu (Edit Banner).
- It is easiest to work from the bottom
up when entering banner text and inserting new rows.
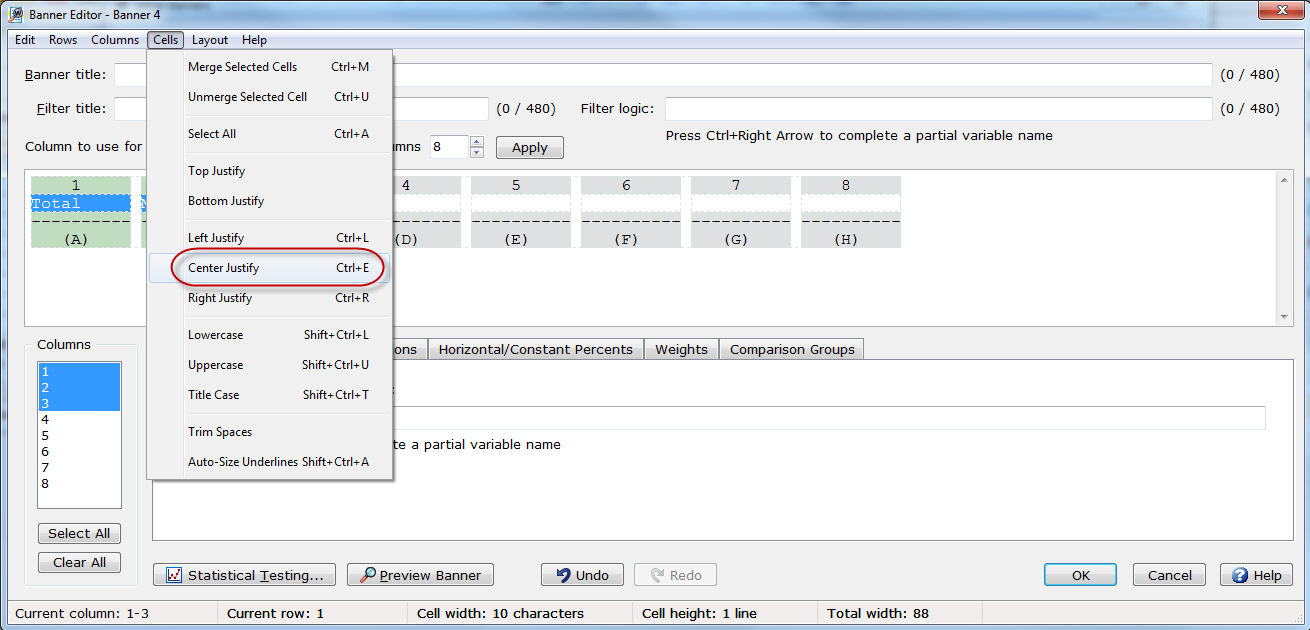
- You can use the justify options on
the Cells Menu to change how
banner text is justified.
- You can also right-click in the banner
cell and use one of the right-click content menu options (Cut,
Copy, Paste
and Multi-Paste). The Multi-Paste option will paste text
from a list (either one column wide or one row high from Excel) into
adjoining cells in the banner.
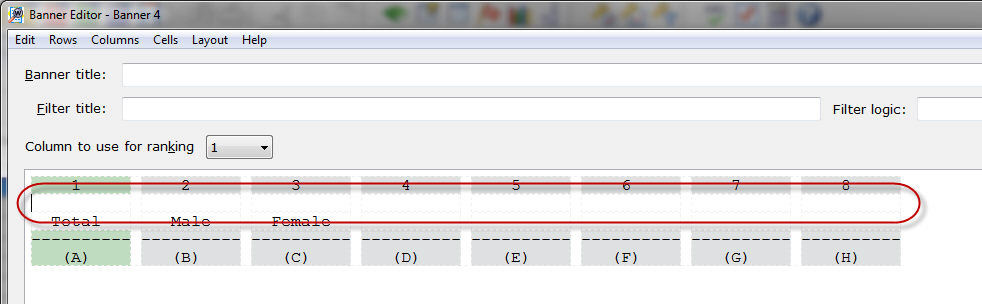
- You can enter new rows in the banner
or delete existing rows by selecting the Rows menu.
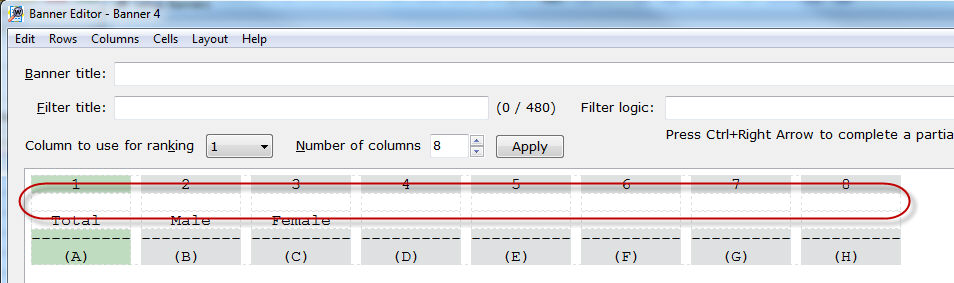
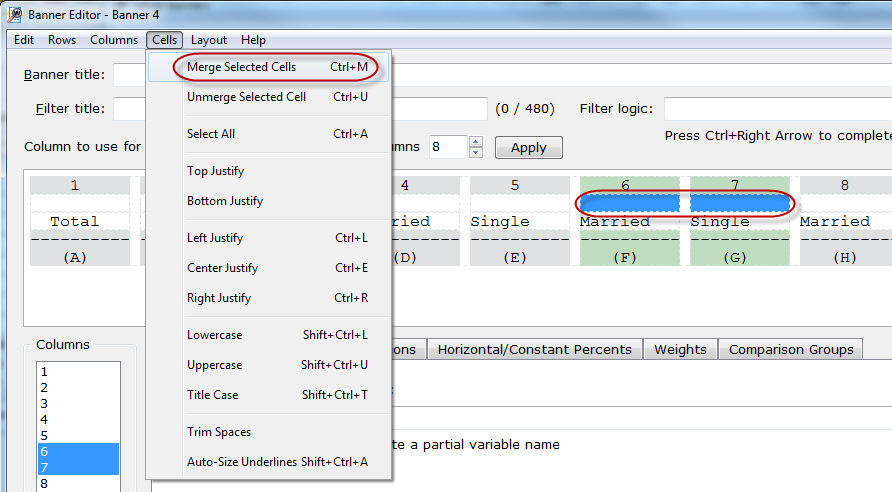
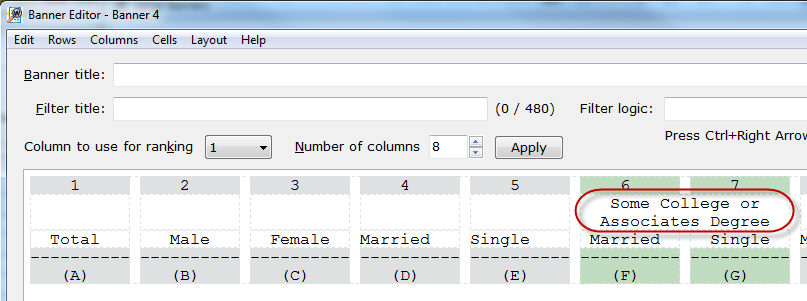
- You can merge cells in the banner
to add a heading over a group of banner columns by first adding a
row above the cells using the Insert
at Current Row option from the Rows menu on the Banner Editor dialog box.
- Highlight the cells you want to merge
and select the Merge Selected Cells
option from the Cells
menu on the Banner Editor
dialog box.
- Enter the appropriate heading text
and underlining in the new merged cell. Use the Center
Justify option of the Cells
menu to center the heading text and underline.
See
the following Banner Editor Menu
options for help with entering and formatting banner text:
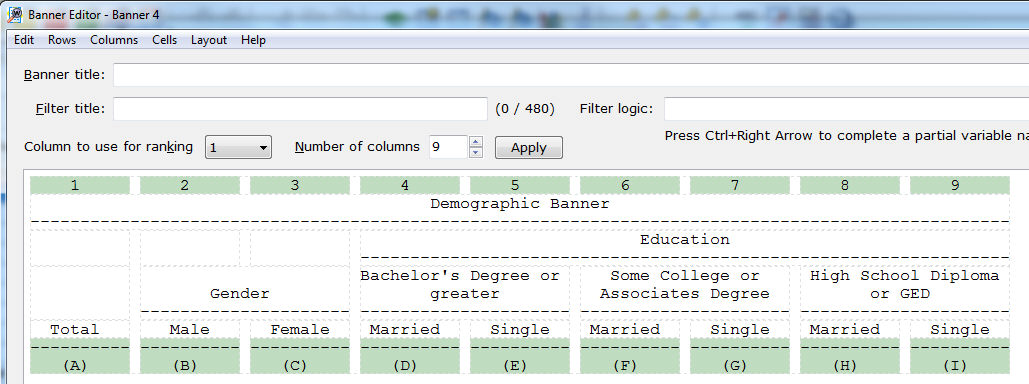
Below is an example of using multiple rows and
merging cells to create a multi-layer banner.
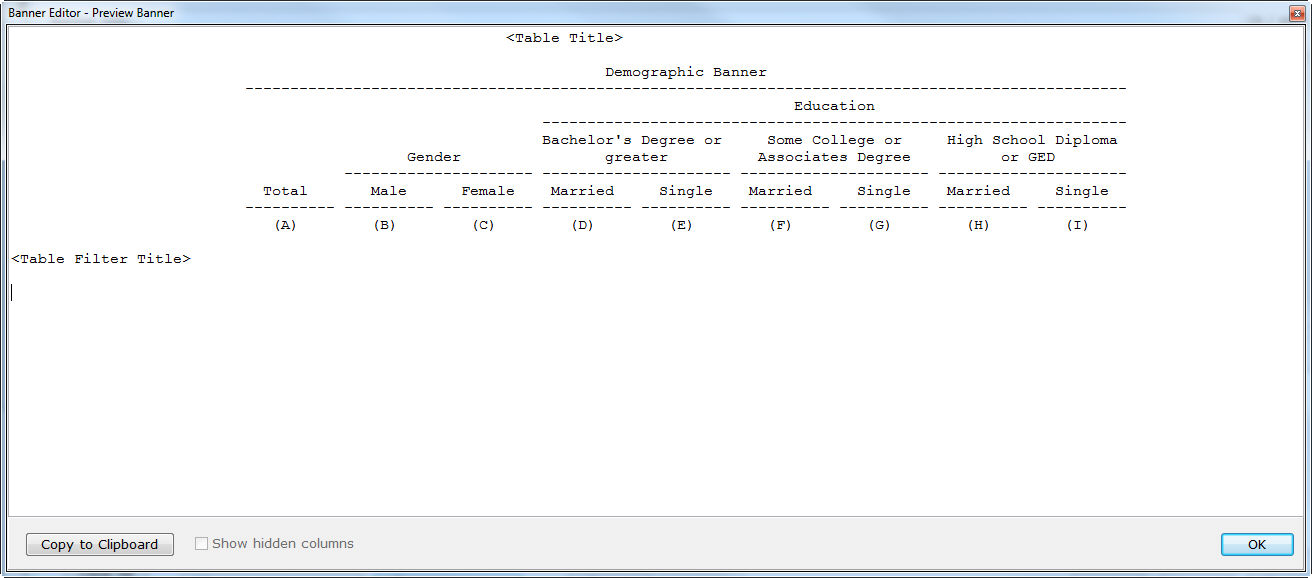
You
can use the Preview Banner button
on the Banner Editor dialog box
to preview how your banner will look (see below).
Related
topics:
How
to create a new banner in WinCross
How
to create a banner template using Banner Templates from Variable Data
Edit Banner
Setup|Banners
Banner
Templates from Variable Data